If you’re eager to add a sprinkle of holiday spirit to your decorations, learning how to make gingerbread pine cones can be a delightful adventure.
These charming ornaments not only fill the air with a cozy scent but also bring a touch of nature’s beauty to your home. Our easy-to-follow guide will walk you through each step, making the process enjoyable and satisfying.
So, let’s get started on this crafting journey together!
Key Takeaways
- To make gingerbread pine cones, mix butter, brown sugar, spices, and flours, then refrigerate the dough for an hour before baking.
- You can add variations like orange zest and chocolate chips to give the gingerbread pine cones a unique twist..
- The dough should be rolled to 1/2 inch thick for sturdy cookies and a cookie mold can be used to add details to the dough.
- The baked gingerbread pine cones can be decorated with colored icing, edible glitter, or powdered sugar to create beautiful and delicious treats.
- The recipe for gingerbread pine cones is adapted from Duff Goldman’s ‘Super Good Cookies for Kids.
- The recipe calls for a pine cone cookie mold, but traditional cookie cutters can also be used.
Gingerbread Pine Cones Ingredients and Preparation
To start making these delicious gingerbread cookies, you’ll need to gather your ingredients. Get your butter, brown sugar, corn syrup, and molasses ready. Find a bowl or a stand mixer to work in.
Now, let’s dive into the steps!
Creating a Cozy Blend
Begin by mixing together the butter, brown sugar, corn syrup, and molasses. As you blend these ingredients, a warm and comforting molasses scent will fill the room. It’s like wrapping your kitchen in a cozy hug.
Building Sweetness Step by Step
While you continue to blend, the sweetness of the mixture starts to build. It’s a gradual process that’s getting your taste buds ready for a delightful experience.
Adding a Twist of Flavor
If you’re feeling adventurous, you can try adding unique variations to your gingerbread cookies. Adding a bit of orange zest or chocolate chips can give your cookies a fun and special twist.
Let Your Creativity Flow
Once your dough is all set, it’s time to let your creative side shine. Shape the dough into your favorite cookie shapes. You could go for classic gingerbread people, stars, or any shape you like.
Adding the Final Touches
Now comes the fun part – decorating your gingerbread cookies! You can use royal icing to add colorful designs, dust them with a sprinkle of sugar, or even add some edible glitter for a touch of sparkle.
Time to Indulge
With everything done, it’s finally time to enjoy your gingerbread cookie delights. These treats are ready to be savored and shared. So gather your loved ones, share a plate of these tasty creations, and make some sweet memories.
Dough Preparation and Refrigeration

Getting your dough ready and chilled is an essential step in making your gingerbread pine cones. Here’s what you need to do:
- Flattening and Wrapping: After you’ve prepared your dough, gently press it flat with your hands. Then, wrap it snugly in plastic wrap. This helps the dough flavors blend together, makes the dough firmer, and prevents the cookies from spreading too much when they bake.
- Refrigeration: Place the wrapped dough in the refrigerator and let it chill for about 1 hour. This cooling time is crucial because it allows the dough to rest and firm up. During this time, the dough becomes easier to work with, and it will hold its shape better during baking.
- Rolling the Dough: Once the dough has chilled, it’s time to take it out of the refrigerator. On a surface that you’ve lightly dusted with flour, carefully roll out the dough to a thickness of about 1/2 inch. This thickness is ideal for creating cookies that are sturdy and hold their shape well.
- Using a Cookie Mold: To add intricate details to your gingerbread pine cones, firmly press a cookie mold onto the rolled-out dough. This step creates beautiful patterns and textures on your cookies, giving them an extra touch of charm.
With your dough properly chilled, rolled, and molded, you’re all set to bring your gingerbread pine cones to life!
Gingerbread Pine Cones Baking Instructions
Follow these simple steps to bake your gingerbread pine cones and bring a touch of delight to your table or loved ones:
- Preheat and Prepare: Begin by preheating your oven as per your gingerbread recipe’s instructions. While that’s warming up, get your baking sheet ready with parchment paper or a light layer of non-stick spray.
- Shape and Arrange: Once you’ve prepared your gingerbread dough according to your recipe, it’s time to shape your pine cones. Gently roll the dough into cone shapes, making sure the bases are flat so they can stand easily. Arrange these on your baking sheet, leaving a bit of space between each one.
- Baking Time: Slide your tray into the preheated oven and bake the pine cones until their edges turn a light golden brown. This usually takes around 12-15 minutes, but keep an eye on them to make sure they don’t get too dark.
- Decorate with Delight: Once your gingerbread pine cones are baked and cooled, it’s time for the fun part – decorating! Get creative with colored icing – squeeze it on like you’re drawing lines or designs. You can also add a touch of magic with edible glitter for that extra sparkle. If you’re a fan of warm, inviting scents, consider dusting them with a bit of cocoa for a cozy touch.
- Share the Joy: Your gingerbread pine cones are now ready to be presented. Arrange them on a plate for a delightful centerpiece or wrap them up as charming gifts for friends and family. The effort and love you’ve put into baking and decorating will surely bring smiles to faces and warmth to hearts.
Remember, baking is an art that invites your personal touch. So, let your imagination run wild as you create these beautiful treats that’ll undoubtedly spread joy and cheer.
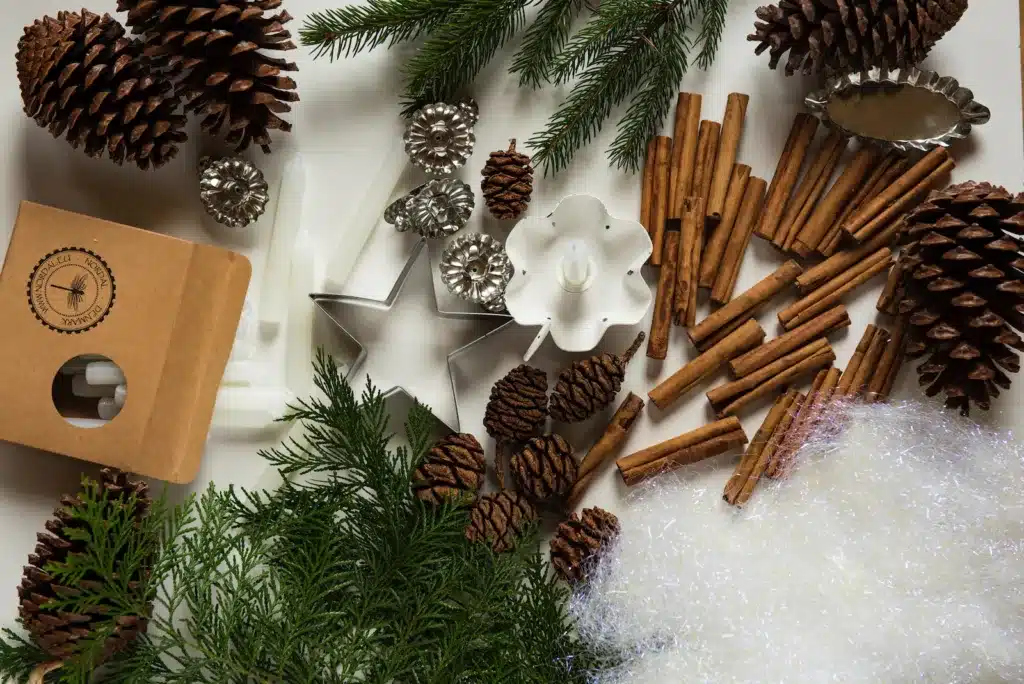
Equipment Needed for Gingerbread Pine Cones
To craft delightful gingerbread pine cones, you’ll want to gather some essential supplies like parchment paper, a cookie mold, royal icing, and powdered sugar.
Here are a few helpful hints for decorating:
- Select Unique Molds: When picking a mold, opt for one that matches the style you want. Whether it’s a classic shape or something more distinctive, your choice will add a touch of charm to your creations.
- Enhance with Royal Icing: Once your gingerbread cones have been baked and cooled, get creative with royal icing. This icing hardens as it dries, allowing you to add intricate designs, delicate lines, or captivating patterns to your pine cones.
- Add a Dusting of Powdered Sugar: For a lovely snow-covered appearance, gently sprinkle powdered sugar over your gingerbread pine cones. This simple step adds an elegant and visually appealing touch.
- Embrace Embellishments: Let your imagination take the lead by embellishing your pine cones with glitter, colored sugar, or small candy pieces. This is your chance to make each cookie a unique work of art.
By following these insightful tips, you’ll be well on your way to creating stunning gingerbread pine cones that are sure to impress!
Nutrition Facts about Gingerbread Pine Cones
Let’s take a closer look at the nutrition facts of these delightful gingerbread pine cones, perfect for the holiday season. When you indulge in this treat, you’re consuming 249 calories and 42g of fat per serving.
It’s important to keep in mind that the enjoyment comes with a reminder to be mindful of the quantity you consume.
Moderation plays a crucial role here. These sweet treats are meant to be savored during special gatherings, spreading joy and adding a festive touch.
So, as you relish each bite, remember to find that balance between indulgence and mindful choices. Your taste buds will thank you, and you can keep the holiday spirit alive in a healthy way.
Serving Size and Quantity
When it comes to the treats during the holidays, it’s important to pay attention to how much you have. Remember, not going overboard is really important. For example, if you look at these cookies, each one has 249 calories and 42g of fat.
And guess what, just one cookie is considered a serving!
But, if you’re thinking about having a lighter holiday feast, here’s an idea: you can break the cookies into smaller bits. Then, you can pair them up with trays of fresh fruits or even some yogurt dip. This way, you get a nice mix of flavors and textures without going too heavy on the treats.
So, whether it’s the whole cookie or just a piece with some fruit, you’ve got options to enjoy your holiday spread in a balanced way.
Tips and Variations
Get creative with holiday cookies using molds for different shapes and more fun baking. Gingerbread ideas can help take your cookies to the next level.
Here are some tips and variations:
- Pine cone molds for unique gingerbread pine cones.
- Royal icing in colors to bring them alive.
- Sprinkles or edible glitter for sparkle and festiveness.
- Experiment with flavors: cinnamon, cardamom, orange zest.
- Try dipping half in melted chocolate for an indulgent treat.
These ideas and flavor variations will impress your guests and make your holiday cookies stand out.
So go ahead and let your creativity shine for yummy results!
Conclusion
As you wrap up crafting your gingerbread pine cones, it’s a great time to step back and admire the mix of creativity and skill that went into making these tasty treats. Each step you followed added a bit of magic to the process.
Now, as you proudly display your creations, remember that the fun of making them is just as nice as biting into the gingerbread.
So, don’t hesitate – share your yummy pine cones and let your love for baking and crafting spread the holiday cheer to everyone around!
Frequently Asked Questions
Can I Use a Different Type of Cookie Mold Instead of a Pine Cone Mold?
Yes, you can definitely use a different type of cookie mold instead of a pine cone mold. Get creative and try out some alternative shapes!
There are so many options available, from snowflakes to gingerbread men to stars. The choice is yours! Using different cookie molds allows you to experiment with unique designs and decorating options.
So go ahead and let your imagination run wild while making these delicious gingerbread cookies. Enjoy the process of creating something truly special!
How Long Can I Store the Gingerbread Pine Cones Before They Go Bad?
You can store your gingerbread pine cones for up to two weeks before they start to go bad. The shelf life of these delightful treats allows you to enjoy them over an extended period.
To keep them fresh, store them in an airtight container at room temperature. This will help maintain their texture and flavor.
So go ahead and make a batch of these delicious gingerbread pine cones and savor them for days to come!
Can I Substitute the All-Purpose Flour With Gluten-Free Flour?
Yes, you can substitute the all-purpose flour with gluten-free flour for your gingerbread pine cones.
When it comes to gluten-free alternatives, there are a variety of options available, such as almond flour, rice flour, or a gluten-free baking mix.
Just make sure to choose a flour that is suitable for baking.
Remember to adjust the amount of flour accordingly, as different gluten-free flours may absorb more or less moisture.
Happy baking!
How Do I Clean the Gingerbread Pine Cones Cookie Mold After Using It?
To clean the pine cone cookie mold after using it, start by gently removing any excess dough or residue.
Then, wash it with warm, soapy water, using a soft sponge or cloth to gently scrub away any remaining bits.
Rinse the mold thoroughly and dry it completely before storing.
When storing your delicious gingerbread pine cones, ensure they are completely cooled and place them in an airtight container or cookie tin to maintain their freshness.
Can I Add Additional Spices or Flavors to the Gingerbread Pine Cones Dough?
Yes, you can absolutely add additional spices or flavors to the gingerbread dough. By incorporating ingredients like cinnamon, cardamom, or even orange zest, you can elevate the taste and customize it to your liking.
These alternative flavors will add a delightful twist to your gingerbread pine cones, creating a more unique and personalized treat. Experiment with different combinations and have fun exploring the possibilities of enhancing the flavor profile of your gingerbread dough.